
 Pin it
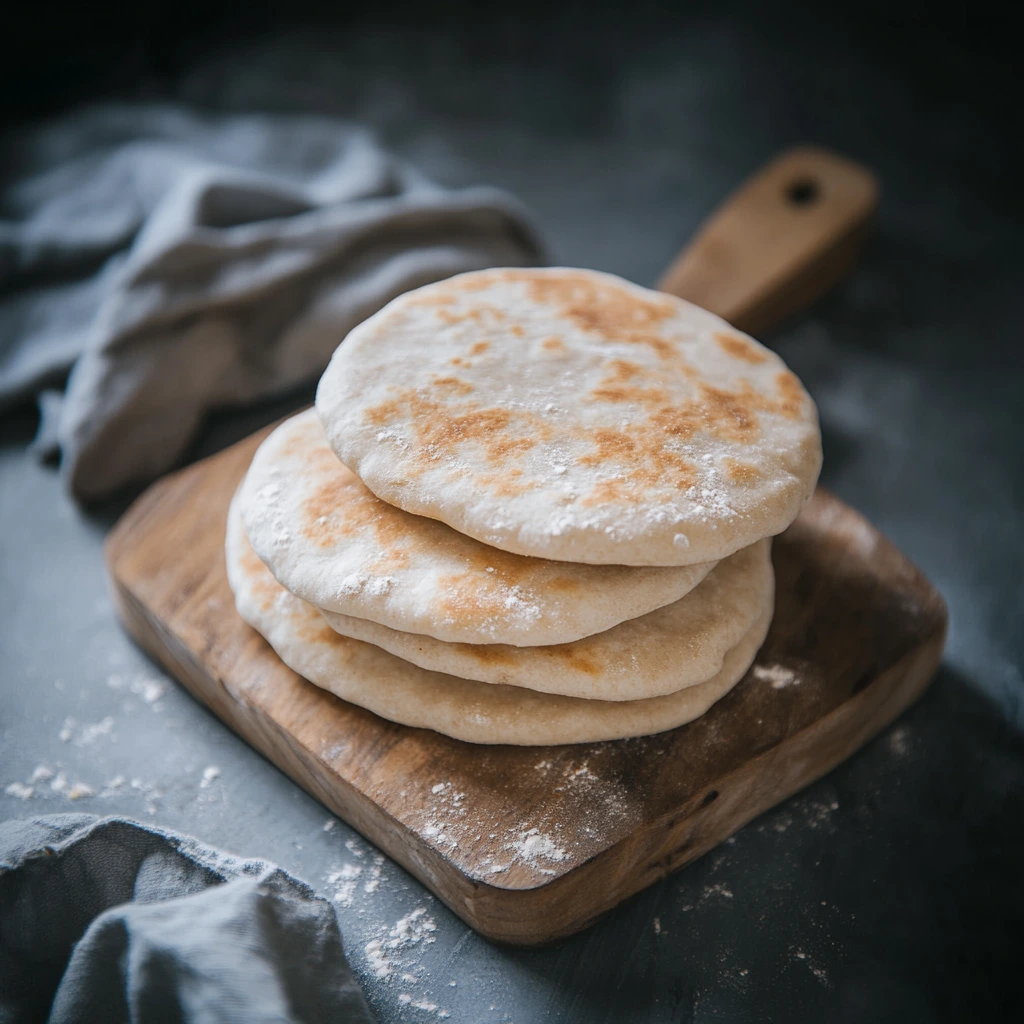
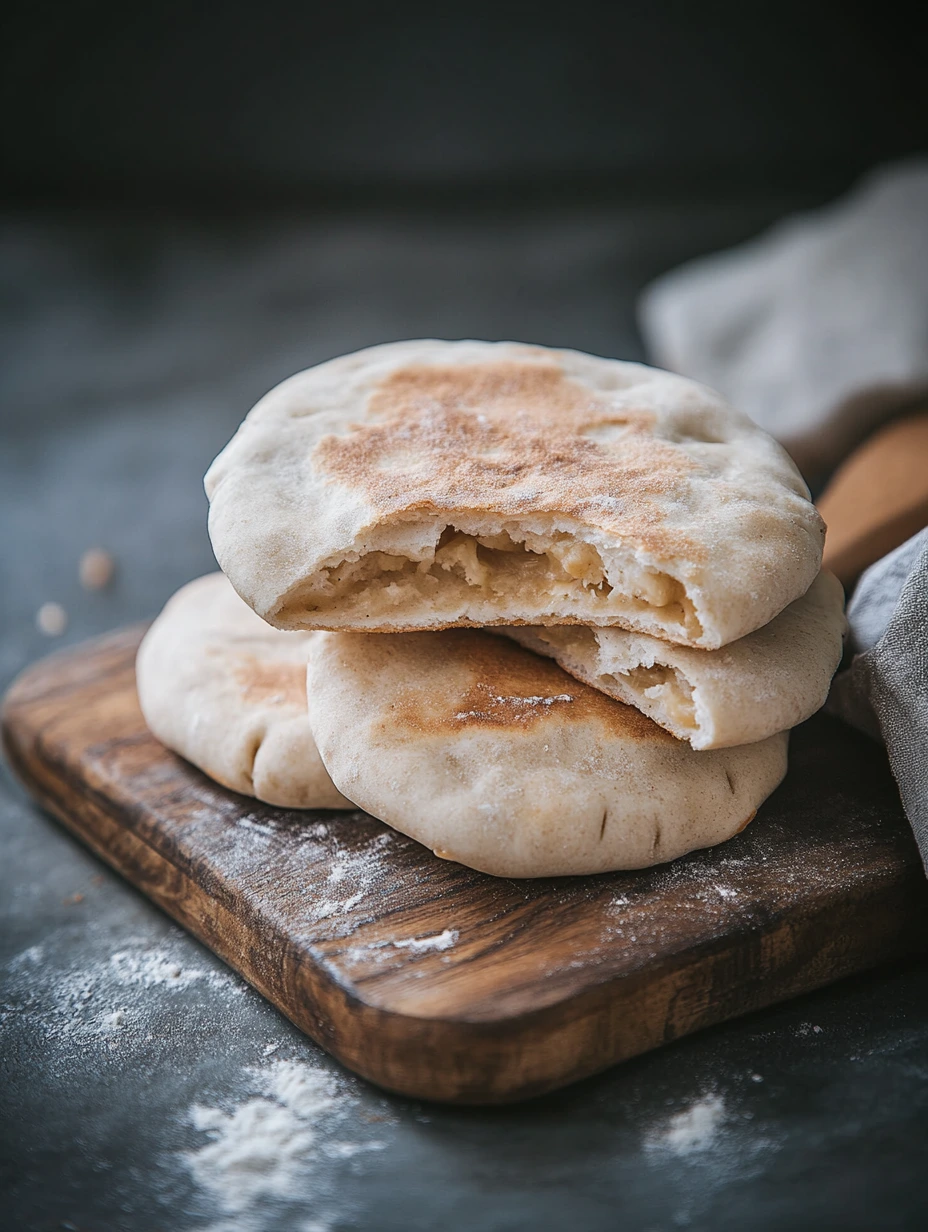
These homemade pita breads go wonderfully with Mediterranean dishes and work great as a base for sandwiches or with dips. They've got that soft inside and slightly crispy outside that makes them so versatile for all your meals.
I make these pitas every week since my son fell in love with falafels during our Greek vacation. Their perfect texture and authentic taste bring back all those sunny Mediterranean memories for us.
Ingredients
- 250 g all-purpose flour: gives the bread just the right texture, grab good quality stuff for best results
- 10 g fresh baker's yeast or 4 g dry yeast: needed to make the dough rise, fresh yeast works best for that authentic feel
- 125 g warm water: getting the temp right matters to wake up the yeast without killing it, about 35°C works great
- 2 tablespoons olive oil: use good quality stuff for better flavor and softness, extra virgin is your best bet
- 1 teaspoon sugar: feeds the yeast and helps get things bubbling nicely
- 1 teaspoon salt: brings out the bread's flavor, just keep it away from direct contact with the yeast
Step-by-Step Instructions
- Making the dough:
- Mix the flour, salt, and sugar in a big bowl until well combined. In a separate small bowl, pour the warm water over your crumbled yeast and let it sit for 3 minutes until you see tiny bubbles pop up, showing the yeast is working. Pour this liquid mix into your flour and add the olive oil. Knead firmly for at least 10 minutes until you get a smooth, stretchy dough that doesn't stick to your fingers. Good kneading is key for developing the gluten that gives pita its special texture.
- First rise:
- Shape your dough into a ball and put it in a lightly oiled bowl. Cover it with a clean, dry kitchen towel or plastic wrap. Let it rest somewhere warm, around 22 to 25°C, for about 90 minutes until it doubles in size. This waiting time really matters because that's when all the flavors develop. You'll know the dough is ready when you gently press it with your finger and the dent stays there.
- Cutting and shaping:
- Sprinkle plenty of flour on your work surface and carefully tip out your risen dough. Use a dough cutter or knife to divide it into 10 equal pieces of about 40g each. Form smooth balls by folding the edges toward the center, then roll them between your palms with light pressure. Place the balls on a floured surface and cover with a kitchen towel. Let them rest for 10 minutes so the gluten relaxes, making them easier to flatten later.
- Baking your pitas:
- Heat your oven to 230°C with a baking sheet or pizza stone inside. On a floured surface, flatten each dough ball to about 4mm thick, making even discs around 12-15cm wide. Work gently to keep the air bubbles in the dough. Place the discs on parchment paper and put them on the hot baking sheet. Bake for exactly 2 minutes, then quickly flip them over and bake another 5 minutes until slightly golden. Your pitas should puff up and create that signature air pocket inside.
My favorite thing about this recipe is how versatile these little breads are. One night when I ran out of dinner ideas, I turned some leftover chicken and veggies into amazing wraps that everybody loved. Since then, pitas have become our go-to solution for thrown-together meals.
Storage
These pita breads stay good for 2-3 days at room temperature when kept in a paper bag or clean kitchen towel. For longer storage, pop them in a sealed freezer bag in the fridge for up to a week. To warm them up, microwave for a few seconds or wrap in foil and heat in a 150°C oven for a few minutes to bring back that original soft texture.
 Pin it
Tasty Variations
You can jazz up your pita bread by mixing in fresh herbs like thyme, rosemary, or garlic before kneading. For a healthier option, swap out a third of the white flour for whole wheat flour and add an extra 10ml of water to make up for the absorption. Want richer pitas? Add a tablespoon of Greek yogurt to your dough for an even softer texture.
Serving Ideas
Pita breads work great with Mediterranean mezze like hummus, tzatziki, or baba ganoush. Split them in half and stuff with falafels, grilled veggies, and tahini sauce for a tasty vegetarian sandwich. They're also super good with grilled meats like shawarma or kebab. For something different at breakfast, spread the inside of a pita with honey and fresh fruit or peanut butter and banana.
Pro Tips
- Don't roll the dough too thin or your pitas won't form that signature pocket inside
- A preheated pizza stone works wonders as it mimics the intense heat of traditional ovens
- Cover your freshly baked pitas with a clean kitchen towel while they cool to keep them soft and prevent them from drying out
Frequently Asked Questions
- → How do I store homemade pita bread?
Keep it in an airtight bag or container at room temperature for up to two days, or freeze it for longer storage.
- → What if my dough doesn’t rise?
Check that your yeast is active, use lukewarm water, and place the dough in a warm spot to help it rise.
- → Can I swap the flour for a different type?
Yes, though the texture might change a bit. Whole wheat or semi-whole wheat flour works well but might need a bit more liquid.
- → Do I have to use the oven for baking?
No, you can cook the pita breads in a hot skillet without oil for a similar texture.
- → Can I prep the dough ahead of time?
Yes, you can refrigerate the dough after the first rise overnight. Let it warm to room temperature before shaping and baking.