
 Pin it
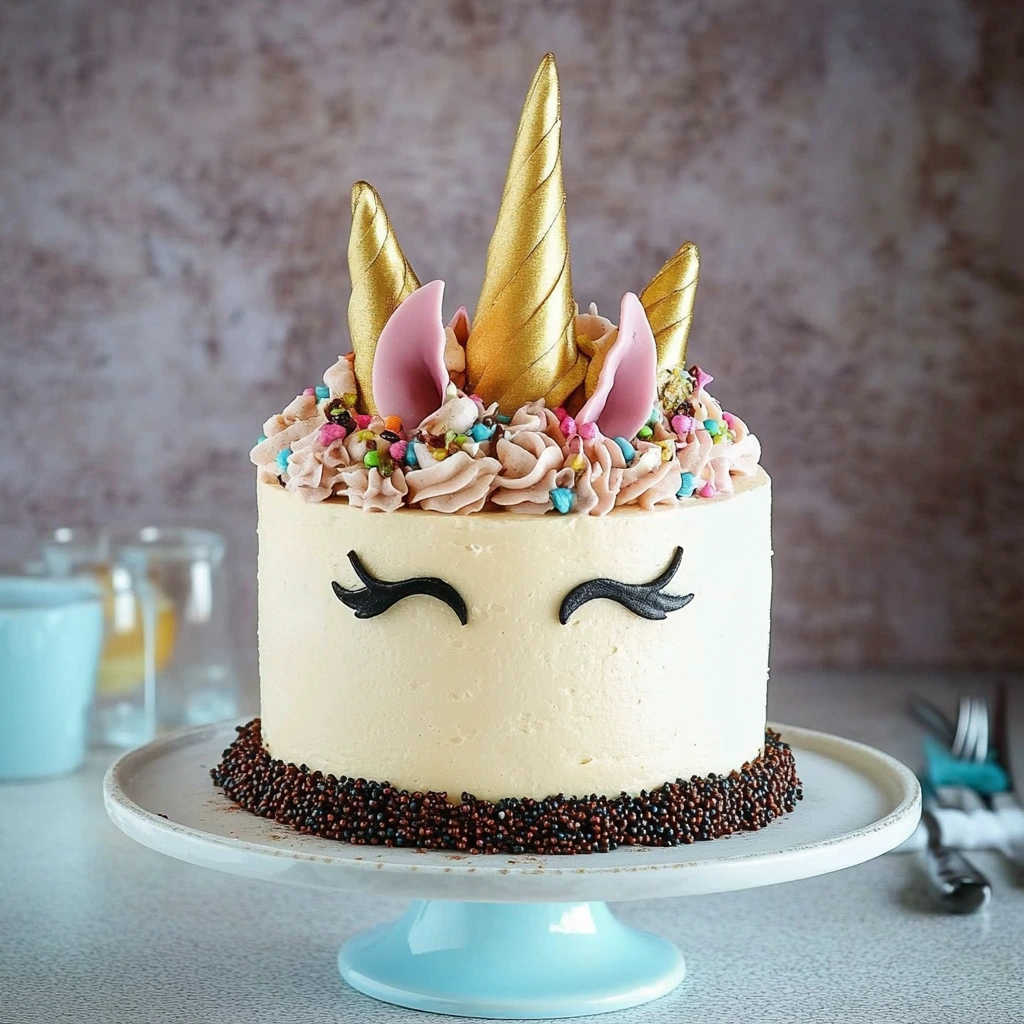
This unicorn cake creates a stunning visual impact that'll brighten any birthday party or baby shower. Behind its magical appearance lies an approachable recipe that, while needing some patience, remains totally doable for amateur bakers. I couldn't resist making this cake for my 4-year-old daughter, temporarily setting aside my natural food principles when faced with her desire for sparkles and magic.
Despite my initial doubts about this colorful, artificial world, I was completely won over by my daughter's reaction when she saw her cake. Her wide eyes and bright smile were worth all the hours spent making this layer cake. While the taste isn't anything extraordinary, the feeling it creates is truly unforgettable.
 Pin it
Must-have tools
- 18 cm cake pans - Three identical pans will save you tons of time. Go for ones with removable bottoms to make unmolding easier
- Offset spatula - This tool is key for smooth, even frosting. A wide flat spatula can work in a pinch but won't be as precise
- Piping bags - You'll need four for the different cream colors. Disposable bags work great for this kind of occasional project
- Star tips - These create the distinctive texture of the unicorn's mane. Mix different sizes for more dimension
- Food coloring - Gel versions work best as they're more concentrated and won't change the cream texture much
- Colorful sprinkles - You need two types: stick-shaped ones for inside the cake and decorative ones for outside
- Unicorn decorations - The cake topper with horn, ears and eyelashes is the signature element
Careful preparation
- Making fluffy cakes
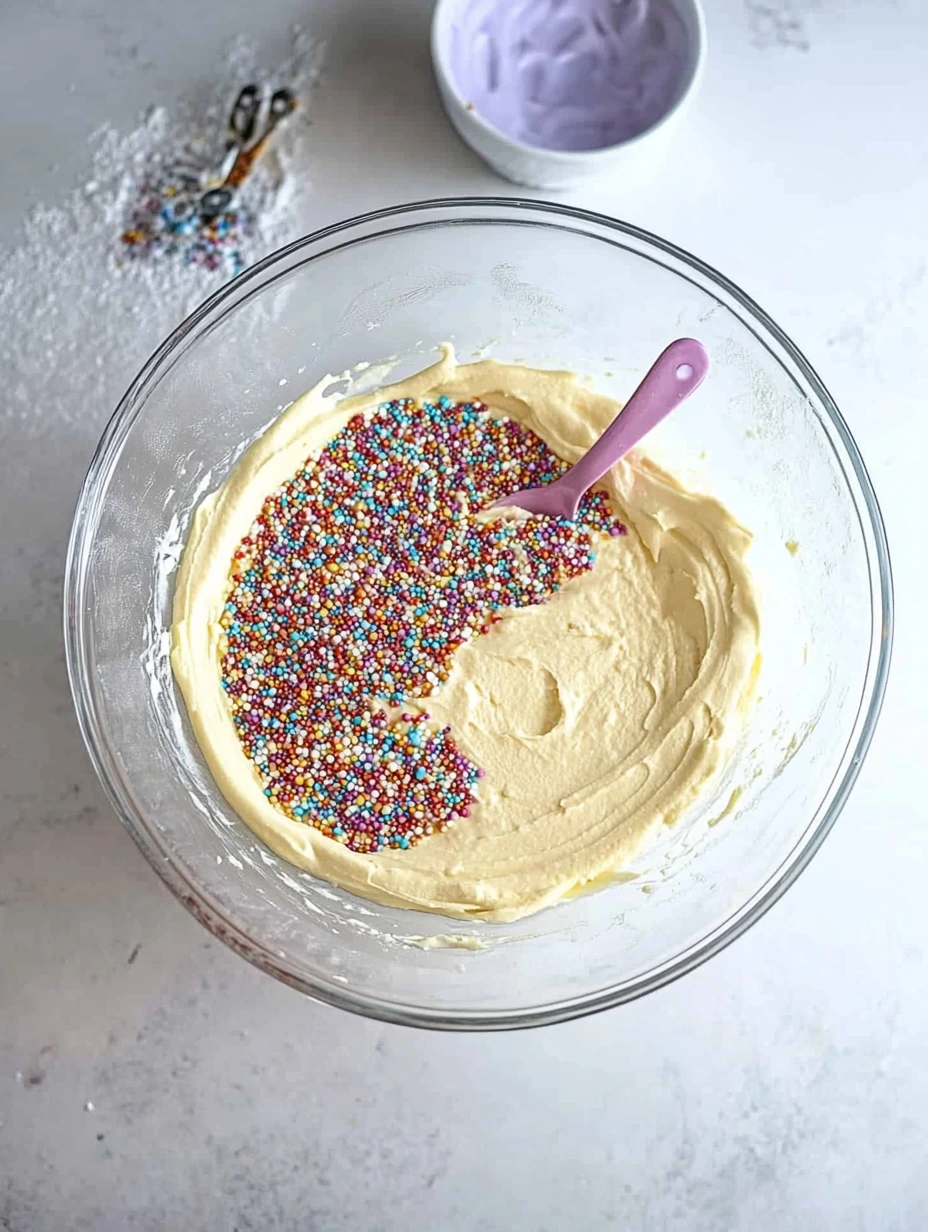
- Heat your oven to 180°C. Butter and flour your three pans thoroughly, or line them with parchment paper for hassle-free removal. Make the cake batter by mixing softened butter and sugar until it's creamy and light. Add eggs one at a time, mixing well after each. Add vanilla, then alternate between sifted flour and milk to keep everything smooth. Gently fold in the stick sprinkles with a spatula without overmixing to keep them from breaking. Divide the batter evenly between the three pans and bake for about 25-30 minutes until a toothpick comes out clean.
- Whipping up silky cream
- While the cakes cool, make the buttercream. Beat softened butter until it's pale and fluffy. Gradually add sifted powdered sugar while beating at medium speed. Mix in vanilla and a tiny bit of salt to boost flavor. Crank up the speed and whip for 5 more minutes until light and silky. Set aside about two-thirds for the white outer frosting. Split the rest into four equal portions to color pink, purple, blue and yellow for the rainbow mane.
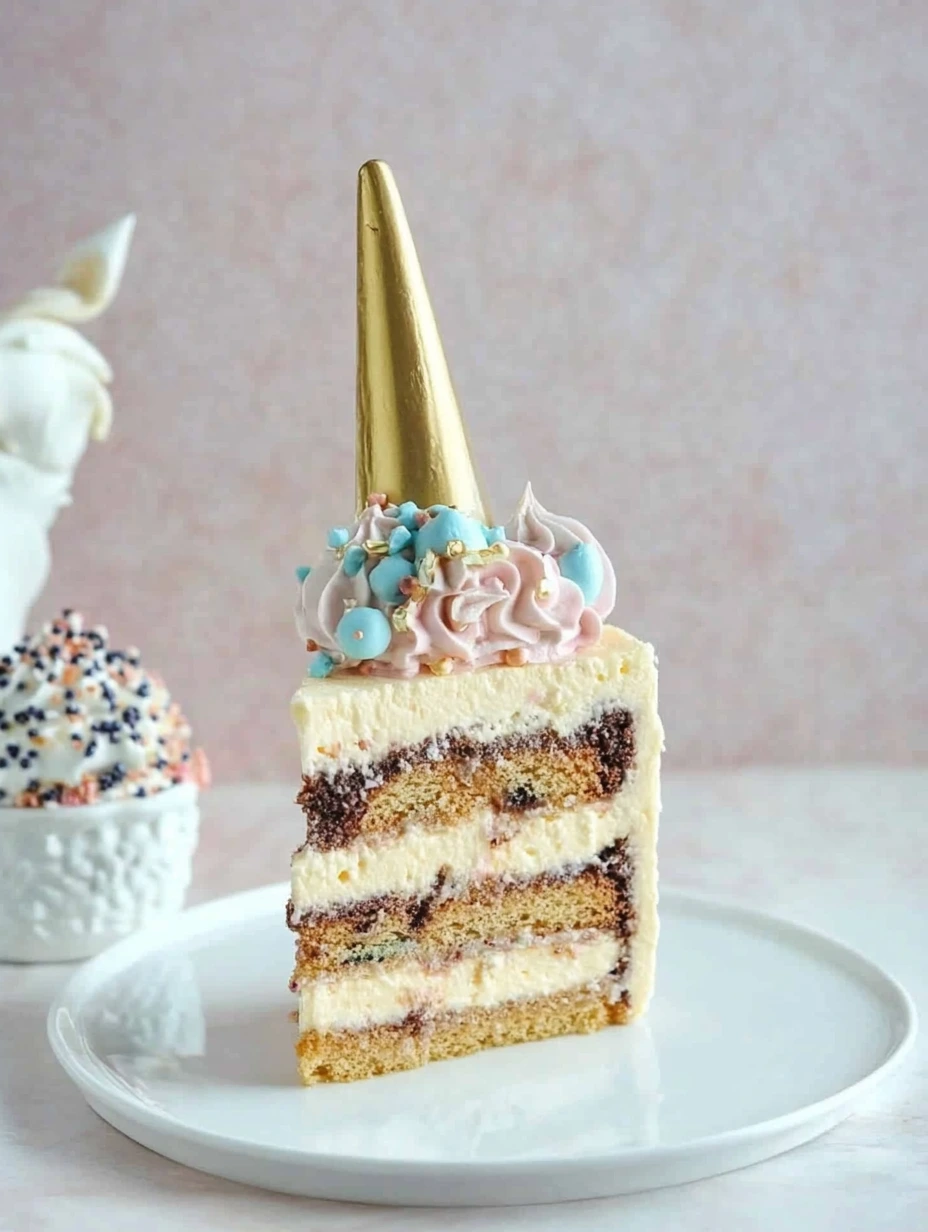
- Building your cake
- Once the cakes are completely cool, level their tops if needed to get flat surfaces. Put the first cake on a cake stand and spread a thick layer of white buttercream. Do the same with the second cake and finish with the third. Apply a thin coat of cream all over the outside to trap crumbs. Chill for 20 minutes to set this first layer.
- Perfect frosting
- Take the cake from the fridge and apply the second coat of white buttercream for a smooth, even finish. Work methodically, starting from the top and moving down the sides. Use your offset spatula slightly warmed under hot water then dried to get a perfectly smooth surface. This pristine white will serve as the backdrop for your unicorn's colorful mane.
- Creating the mane
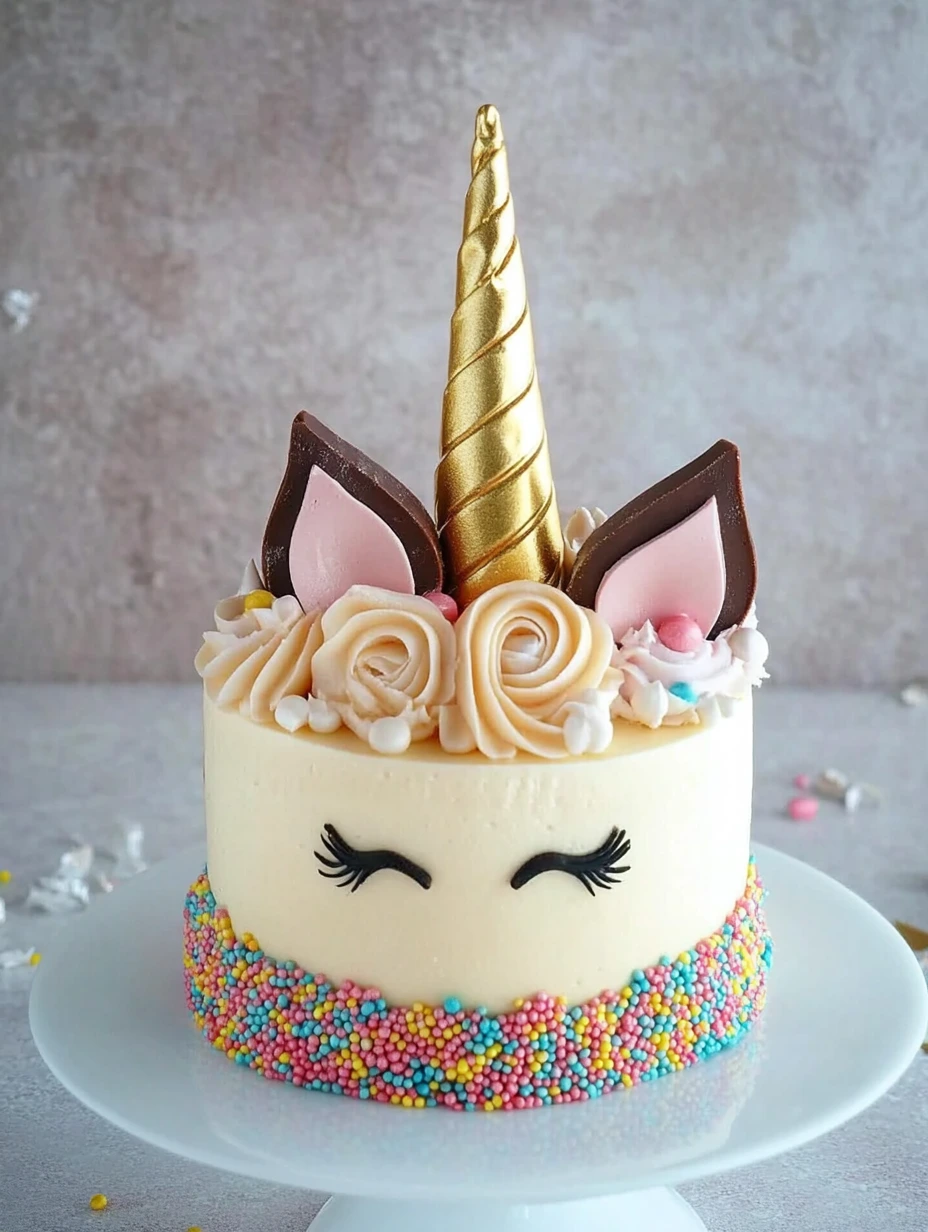
- Fill each piping bag with a different color and attach star tips. Start by making a line of colored rosettes on top of the cake, alternating colors. Continue down the sides to form the mane flowing elegantly. Vary your pressure and height to create texture and movement. Let your creativity flow - there aren't strict rules for this step!
Colorful sprinkles play a huge role in this cake. I learned the hard way that they don't all behave the same during baking. For inside the cake, I now only use stick-shaped sprinkles that keep their bright colors without bleeding into the batter. My first attempts with fancier confetti completely melted while baking, leaving weird colored streaks in my cake. This little mishap taught me how important it is to pick the right decorations based on where they'll go in the cake.
 Pin it
Magical touches
To really turn your creation into a unicorn, carefully place the cake topper elements on top. Put the golden horn in the center, then position the ears on either side. Add eyelashes to the front to bring the unicorn's face to life. For an even more enchanted finish, sprinkle decorative rainbow sprinkles, silver or gold pearls, and edible glitter on top and around the base. A light spray of edible glitter spray will add a sparkly dimension that catches the light. If you want to go further, create a small cotton candy cloud that seems to carry your unicorn, or add pastel sugar flowers to enhance the design.
Creative customizations
This cake works well with many adaptations depending on tastes and occasions. For a Christmas unicorn cake, go with red, green and white colors with some gold touches. For a Halloween unicorn, use shades of orange, purple and black with star and moon decorations. If the child loves one color, make a monochrome mane in different shades of that tone. For a more sophisticated version suited to a baby shower, stick to very soft pastel tones and add delicate sugar flowers. You can also change up the cake and cream flavors based on preferences, maybe adding almond extract, lemon, or even chocolate for a more interesting taste.
Smart planning
This cake needs good planning, but most parts can be made ahead. Make the cakes up to two months before the event and freeze them carefully wrapped in plastic wrap then aluminum foil. The buttercream can be made up to a week ahead and kept in the fridge in an airtight container. The day before the party, thaw the cakes in the fridge and bring the cream to room temperature. On the big day, set aside about two hours for assembly and decoration, finishing at least three hours before serving to let the cake stabilize at room temperature. This methodical approach will help you enjoy the event without last-minute stress.
This unicorn cake means way more to me than just a dessert. It stands for those special moments when we put aside our sensible adult principles to dive into our children's magical world. Watching my daughter proudly show "her" cake to her friends, I realized I'd created not just a treat, but a memory she'll carry her whole life. Sometimes, magic isn't found in technical perfection or authentic ingredients, but in the pure joy lighting up a child's face. And for that, some colored sprinkles and a golden horn are worth all the effort in the world.
 Pin it
Childhood wonder
This cake is more than just baking - it's a doorway to the enchanted world of childhood. In our often rational, practical daily lives, it reminds us to keep those moments of pure fantasy that feed children's imagination. While making this cake, I realized these magical moments are just as precious for parents as they are for kids. Seeing the wonder in my daughter's eyes reconnected me with the childlike part that sleeps in all of us, the part that still believes in imaginary worlds and fantastic creatures. Giving in occasionally to these colorful fantasies helps us build unique bonds with our children and create memories that will last for years.
Theme variations
This cake concept can be changed endless ways while keeping its magic. For a Rainbow Dash cake inspired by My Little Pony, use brighter rainbow gradients for the mane and add a small marshmallow cloud on the side. For a more boyish or neutral unicorn, go with blues, greens and turquoise with silver decorations instead of gold. A "snow unicorn" version with icy blue and white shades, sprinkled with sugar snowflakes, works perfectly for a winter birthday. For smaller kids, keep it simple by creating an individual unicorn "smash cake" with minimal but equally magical decoration. These tweaks let you personalize the experience while keeping the fairy-tale spirit that makes this cake so charming.
Buttercream alternatives
If buttercream seems too rich or too sweet, you've got several other options. Cream cheese frosting gives a creamy texture with a tangy touch that balances the cake's sweetness. Swiss meringue buttercream, though trickier to make, offers a silky texture and less intense sweetness. For a lighter version, try stabilized whipped cream (with mascarpone or whipped cream stabilizer) for a welcome freshness, especially nice in summer. These options let you adjust the cake to your guests' taste preferences while keeping the magical look that makes it special.
Serving your unicorn cake
How you present the cake is a highlight of the party. To make the biggest impact, create a real production: place the cake on a raised stand decorated with tiny sparkling stars or pastel flowers. Light sparkler candles or fountain candles right before bringing it into a slightly darkened room for a spectacular effect. Serve matching colorful drinks in decorated glasses. Capture this moment by taking photos of the child discovering their cake - these shots will preserve the pure wonder that makes this creation so worthwhile. For serving, get plates and napkins in matching colors to extend the themed experience until the very last bite.
 Pin it
Managing hopes and reality
It's important to approach making this cake with realistic expectations. Those perfect images found online often come from pros who spent many hours on them. For a first attempt, aim for simplicity and overall effect rather than perfect details. Remember that kids care much more about the thought and wonder than technical perfection. If your mane isn't perfectly even or your frosting has a few flaws, keep in mind that these "imperfections" are part of the charm of something made with love. What matters most is that the whole thing clearly looks like a unicorn and creates that magical spark in a child's eyes.
Frequently Asked Questions
- → Can this unicorn cake be made ahead of time?
- Yep! Bake the cake layers up to two days in advance and wrap them tightly in plastic wrap once cooled. The buttercream can be prepped the day before. Assemble and decorate it the day of your event or the night before.
- → What’s the best way to store this unicorn cake?
- After decorating, store the cake in the fridge for up to three days. Set it out about two hours before serving so the buttercream softens to its perfect texture. If using store-bought horns and ears, add them right before serving.
- → Can I use a different type of cake for this?
- For sure! You can swap in your favorite cake recipe, like sponge cake, chocolate, or red velvet. Just make sure the cake is firm enough to handle the layers and decorations.
- → What if I don’t have three identical pans?
- No problem! Bake one layer at a time if needed, leaving the excess batter at room temperature. Clean and prepare the pan between rounds. It’ll take more time, but the final result will still be awesome.
- → What’s a good buttercream substitute for less sweetness?
- Try cream cheese frosting for something less sweet but easy to dye and work with. Whipped white chocolate ganache is another great, lighter option—though it’s a bit trickier to make.