
 Pin it
Nothing beats a proper butter brioche with its stretchy crumb and mouthwatering smell - it's the ultimate baker's delight for me. I've tried countless versions over the years, but this one I'm sharing today just works every single time. You can't go wrong with its amazing texture and genuine taste - a true classic that always delivers.
I made this brioche for our family get-together last month and my picky nephew asked for three slices back-to-back. Even my mother-in-law, who never shares her family recipes, wanted to know my secrets. It was a hit across all generations!
The perfect foundation
- Special T45 flour: brings the fineness and lightness needed for an airy brioche
- Fine salt: balances flavors and helps build the dough structure
- Crystal sugar: feeds the yeast and adds just enough sweetness without going overboard
- Fresh baker's yeast: for the best rise and full flavor development
- Whole eggs at room temperature: enriches the dough and gives that golden color
- Unsalted butter at room temperature: blends in perfectly for that unmatched texture
 Pin it
Choosing T45 flour isn't random in this. Its lower gluten content creates that light, airy texture that quality pastries are known for. During my last bake, I found some stone-ground flour from a small local producer that took my brioche to another level with slight nutty notes my guests noticed right away.
Step-by-step method
Making the dough
Start by putting sifted flour in your stand mixer bowl. Add salt on one side and sugar on the other so the salt doesn't touch the yeast directly, which might stop it from working. Crumble the fresh yeast right onto the sugar which will start feeding it. Mix in the lightly beaten eggs and begin kneading at low speed for about five minutes until everything comes together nicely.
The key kneading stage
Slowly turn up the speed to medium. Let it knead for a good fifteen minutes until the dough gets stretchy and starts pulling away from the sides of the bowl. This kneading time really matters for building up the gluten network that gives your brioche its signature texture. At this point, the dough should look smooth but still feel sticky.
Adding the butter
Turn down the mixer speed and drop in small pieces of soft butter one at a time, waiting for each piece to disappear before adding the next. This might take up to ten minutes and needs some patience, but it's vital for getting that stretchy texture we're after. The dough will seem to fall apart at first before coming back together into a shiny, uniform mass.
First rise
Gently move the dough to a large, lightly oiled bowl. Cover it with plastic wrap or a damp cloth and let it rise in a warm spot for about two hours, until it doubles in size. If you prefer, you can put the dough in the fridge for a slow overnight rise, which will make the flavors even better.
Shaping
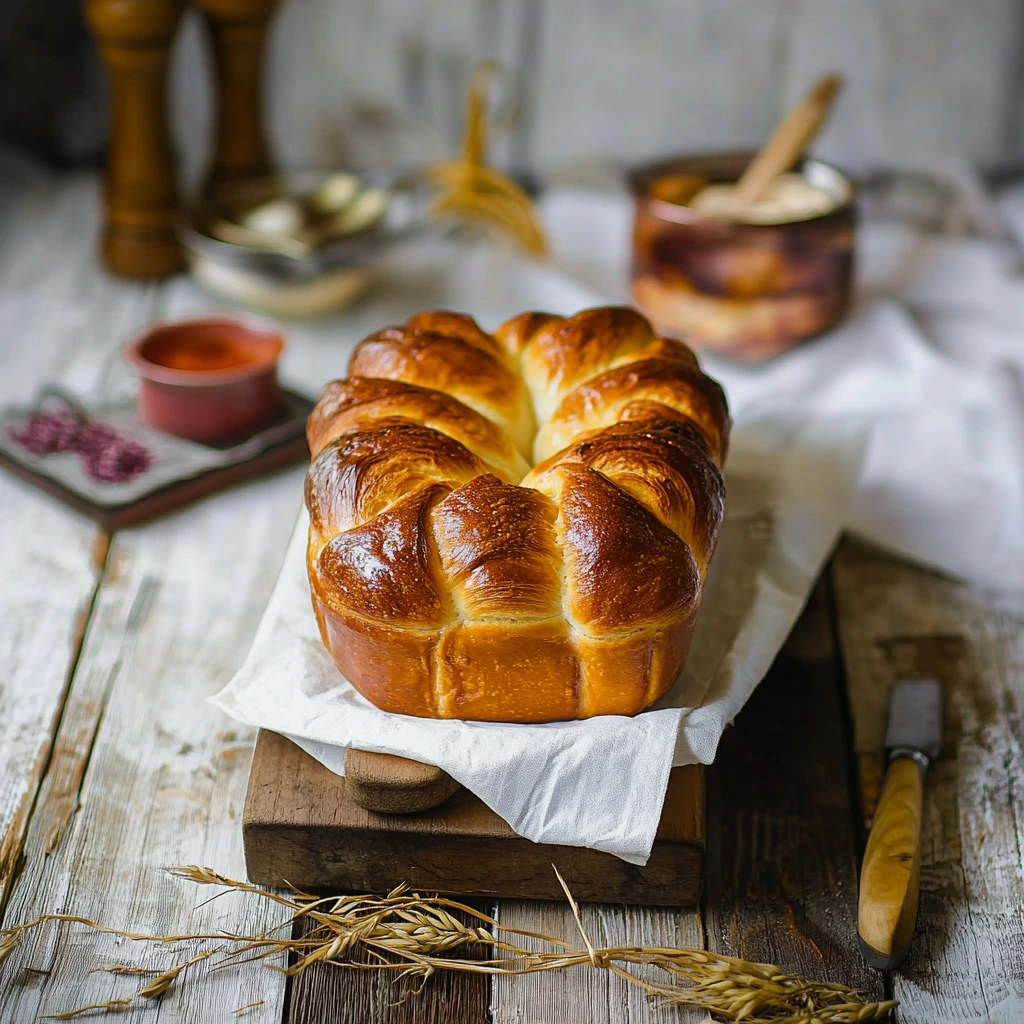
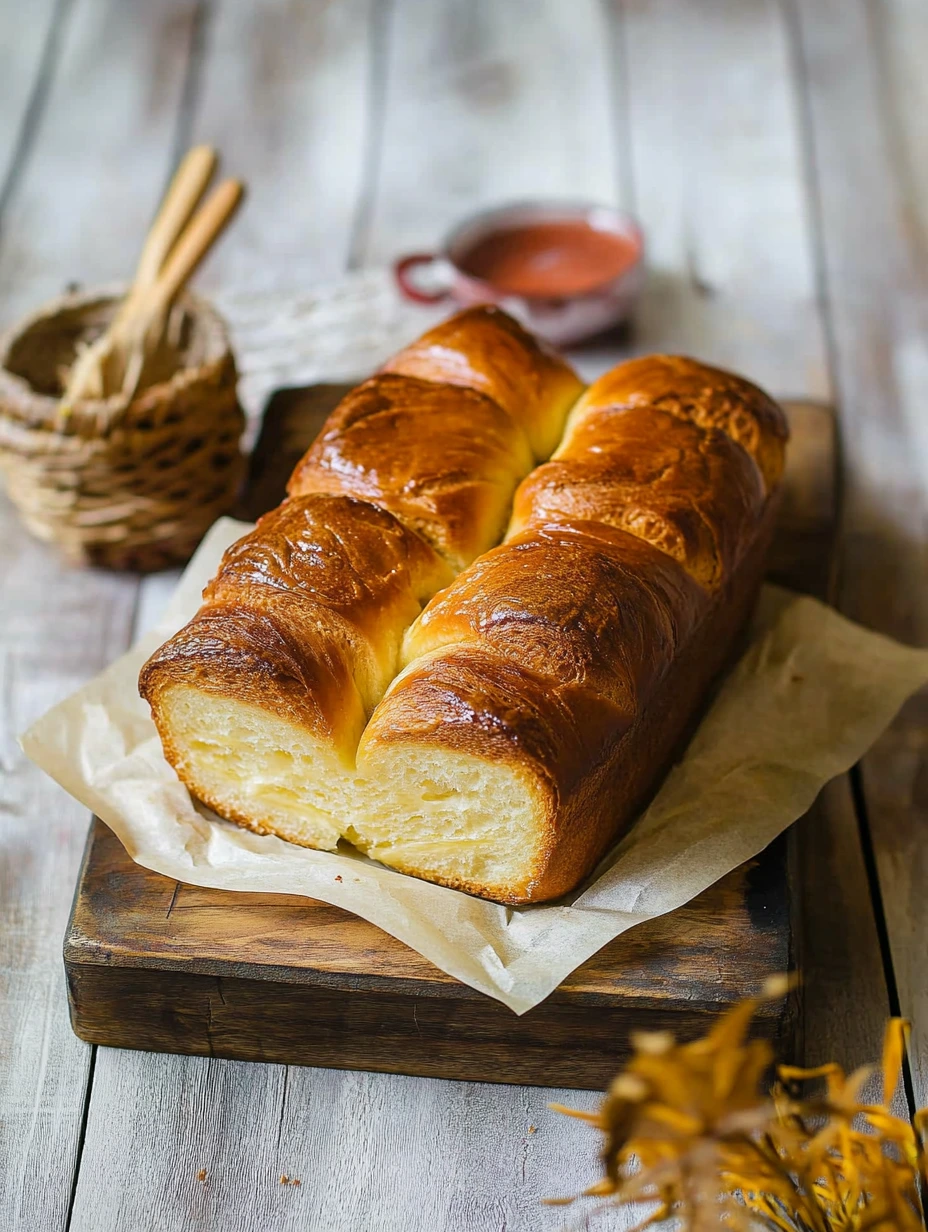
Once the dough has risen well, gently press it down to release the air. On a lightly floured surface, cut the dough based on your preferred shape. For a traditional brioche à tête, make six or eight equal-sized balls plus a smaller one for the top. For a braided brioche, split the dough into three equal parts and roll each into a long strand before braiding them.
Second rise
Put your shaped brioche in a buttered mold and let it sit in a warm place for about an hour. The dough should double in size again and feel very light and airy. This second rise helps the brioche develop its characteristic texture and generous volume.
 Pin it
Glazing and baking
Heat your oven to 180°C. Gently brush the brioche surface with beaten egg for a beautiful golden color when baked. Bake for about thirty minutes, keeping an eye on the color. A properly baked brioche should be evenly golden and sound hollow when you tap the bottom of the mold.
My family always had a special routine around Sunday brioche. My grandma would prepare her dough on Saturday night, and we'd wake up Sunday morning to that captivating smell filling the house. I wanted to keep this tradition going with my own kids, and now it's a highlight of our weekends. These small food rituals really do create our most treasured family memories.
Perfect pairings
This homemade brioche tastes best slightly warm, when its aroma peaks. Enjoy it with a strong black coffee that balances its buttery sweetness. For a truly special breakfast, serve it with a selection of handmade jams, homemade palm oil-free spread, or just a bit of acacia honey, which goes wonderfully with the rich brioche.
Tasty variations
This classic brioche base can easily adapt to whatever you're craving. Mix in chocolate chips just before shaping to please sweet tooth fans. A version with crushed pink pralines will remind you of Lyon specialties. You can also subtly flavor the dough with orange blossom water, vanilla, or even saffron for something more unique and sophisticated.
Keeping it fresh
Your brioche will stay good for three to four days in a paper bag or wrapped in a clean kitchen towel to keep it soft without making it damp. To enjoy it beyond that, slice it and freeze the individual pieces. You can then pop the frozen slices straight into the toaster. To bring back the softness to a few-day-old brioche, warm it for a few minutes in a 150°C oven or a few seconds in the microwave.
Making homemade brioche means more to me than just following a recipe - it connects me to centuries of tradition and craftsmanship I love passing on. Each time I work with this generous dough, I feel that unique satisfaction of a baker who knows that in just a few hours, they'll be offering a simple but perfect pleasure to loved ones. Maybe that's the real secret ingredient in this recipe after all.
Frequently Asked Questions
- → Can dry yeast replace fresh yeast?
- Yes! Just swap 20g of fresh yeast with 7g of dry yeast. Mix it into warm milk to activate before adding.
- → Why didn’t my brioche rise properly?
- Double-check your yeast is active and ensure your dough sits in a cozy spot (around 25-30°C). Avoid cold rooms!
- → Can I knead the dough without a mixer?
- Sure, it’ll just take more effort. Knead by hand for about 20-25 minutes until the dough is smooth and stops sticking after butter.
- → How do I know if it’s fully baked?
- Check by inserting a knife—it should come out clean. Also, tap the bottom of the loaf; it should sound hollow.
- → How long will the brioche stay fresh?
- Store it in an airtight container for 3-4 days at room temp or slice and freeze it to toast later.