
 Pin it
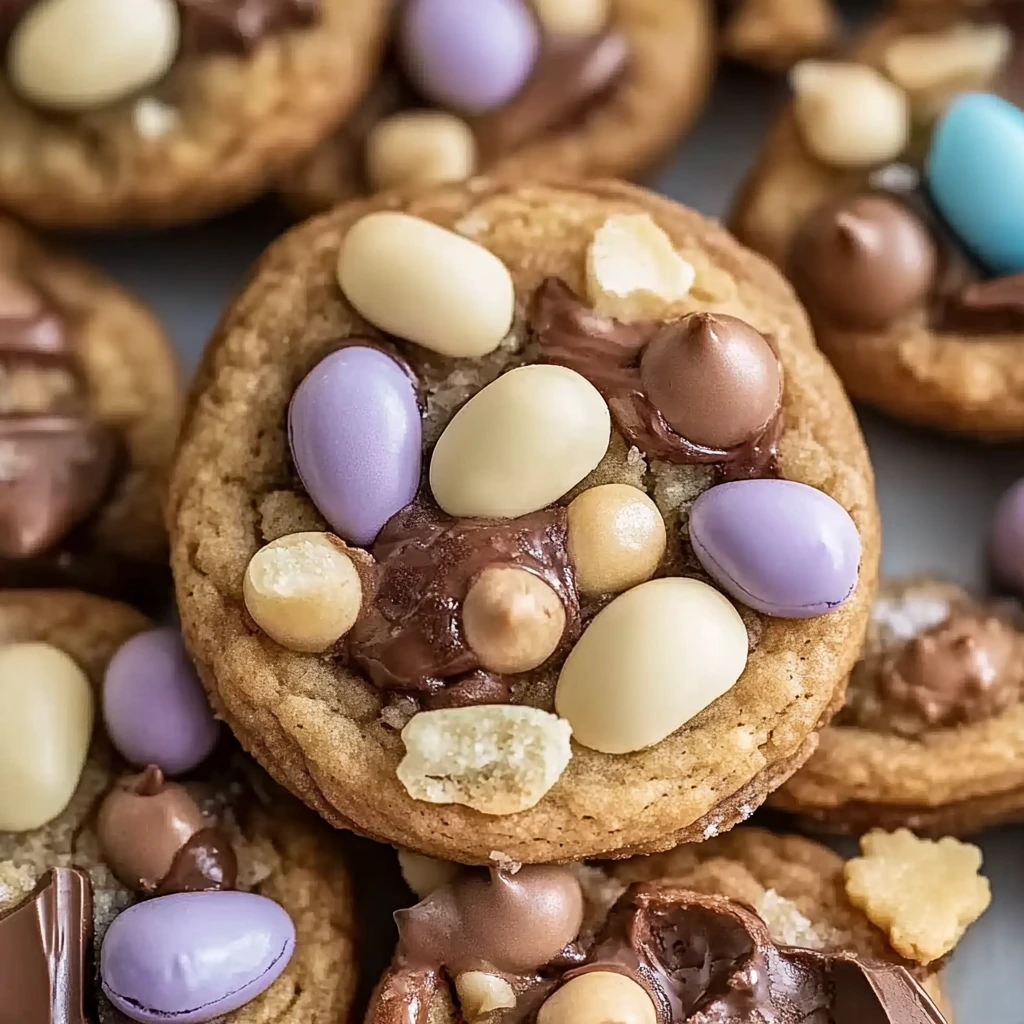
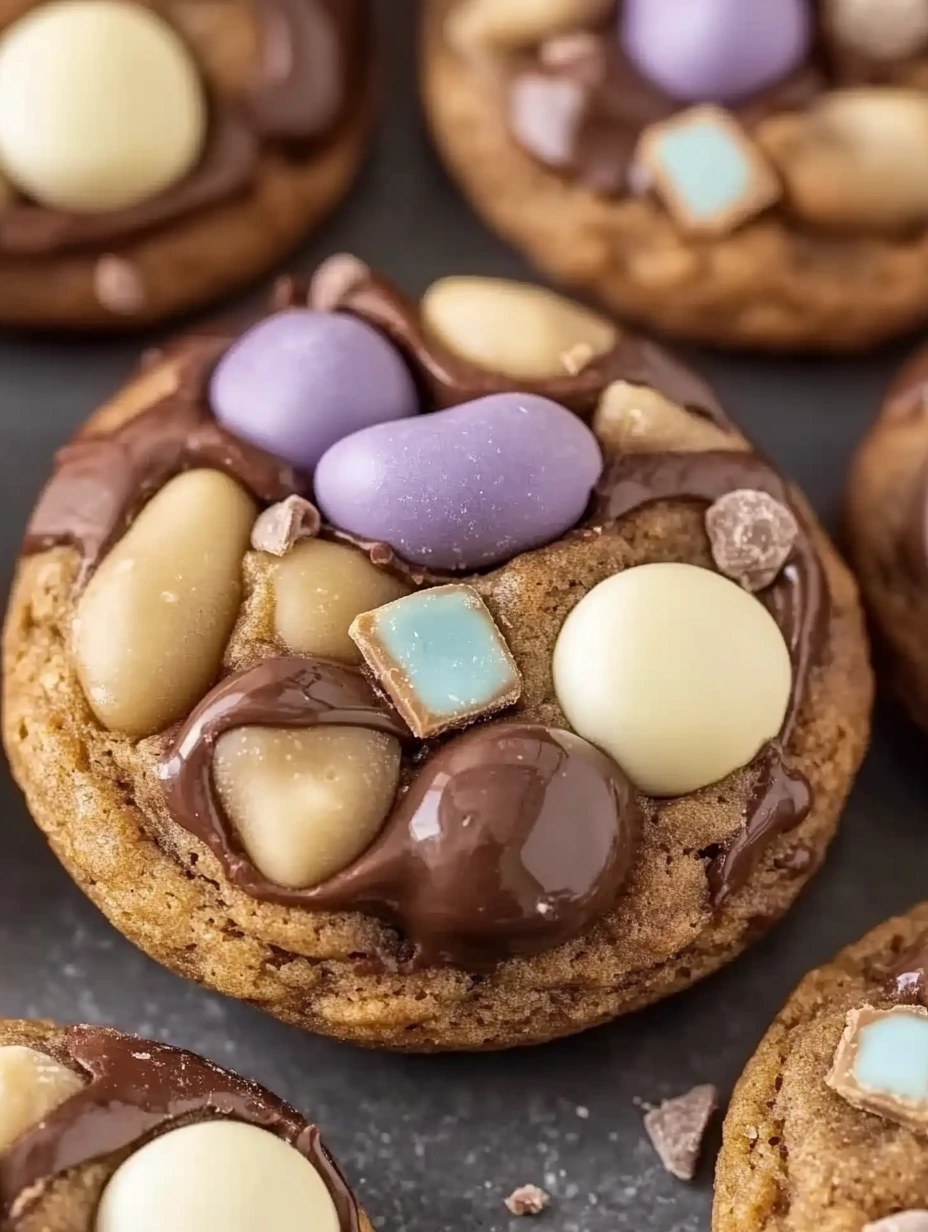
These tasty chocolate cookies brighten up any Easter table and make everyone happy with their irresistible chocolate flavor and cute festive decorations.
I've been making these cookies every year since my kids were little. What started as just something to keep them busy during holidays has turned into a family tradition that even my teenagers still ask for.
What You'll Need
- Softened unsalted butter: gives these a melt-in-your-mouth texture & rich taste - make sure it's room temperature
- Brown sugar: adds a deeper caramel-like sweetness than white sugar & fine brown sugar works best
- Egg: holds everything together & works better when not cold from the fridge
- Vanilla extract: makes the chocolate flavor pop & real bourbon vanilla tastes way better
- Flour: creates the cookie structure & pastry flour is perfect here
- Unsweetened cocoa powder: for that intense chocolate kick & premium brands make a big difference
- Baking powder: gives a slight softness in the middle & check it's still good before using
- Mini sugar or chocolate eggs: for the fun Easter look & any brand works great
Easy Steps
- Make the creamy base:
- Beat the soft butter with brown sugar for at least 3 minutes until it looks light and fluffy. Don't rush this part - it's key for getting the perfect cookie texture. The mix should get a bit paler and look kind of whipped.
- Add the wet stuff:
- Throw in the egg and vanilla, then mix for about a minute on medium. Make sure the egg gets completely mixed in. Don't worry if it looks more liquid now - that's totally normal.
- Mix in the dry ingredients:
- Sift the flour, cocoa, baking powder and salt together, then slowly add them to your wet mixture. Just mix enough to get everything combined. If you mix too much, your cookies will end up hard.
- Let it chill:
- Roll the dough into a ball, wrap it in plastic, and stick it in the fridge for at least 15 minutes. This rest time firms up the butter and makes the dough easier to roll out. You can even leave it overnight if you want.
- Shape your cookies:
- Heat your oven to 350°F. Roll the dough between two sheets of parchment paper until it's about 1/4 inch thick. Use cookie cutters on the cold dough for clean shapes. Put them on a parchment-lined baking sheet with about an inch between each one.
- Bake them just right:
- Bake for exactly 10-12 minutes. The edges should be firm but the centers still a little soft since they'll harden as they cool. Let them sit on the hot pan for 5 minutes, then move them to a rack to finish cooling.
- Add the fun decorations:
- Melt your decorating chocolate slowly in a double boiler or microwave it in 20-second bursts. Use a teaspoon or piping bag to drizzle it on the cooled cookies. Quickly put on the mini eggs and other decorations before the chocolate hardens.
My special trick is adding a few drops of orange essential oil to the melting chocolate. It creates an amazing contrast with the cookie's chocolate flavor and reminds me of the traditional Easter eggs my grandma used to make.
Keeping Them Fresh
Wait until your cookies are totally cool before storing them in a metal or glass container with a tight lid. Put parchment paper between layers so the decorations don't stick together. They'll be perfect for about a week at room temperature, but if you want them to last longer, you can freeze them for up to a month - just don't add the decorations until after thawing.
 Pin it
Mix It Up
You can easily change this recipe to fit different tastes or dietary needs. For gluten-free cookies, swap regular flour with a mix of rice flour and cornstarch in equal amounts. If you can't have dairy, use plant-based margarine instead of butter. Want to make them extra special? Try adding chocolate chips to the dough or a pinch of cinnamon or cardamom for more complex flavors.
Serving Ideas
Show off your cookies on a pretty plate or in a basket lined with edible Easter grass for a complete holiday feel. They go great with hot chocolate for an afternoon treat, or wrap them in clear bags tied with colorful ribbons for cute gifts. Adults might enjoy them with hazelnut or vanilla-flavored coffee that brings out the chocolate notes.
History Behind The Treat
These cookies connect to French Easter sweet traditions going back to the Middle Ages. Back then, after giving up treats for Lent, people celebrated Easter with sweets that finally used up all the eggs they'd been saving. The egg, bunny, and bell shapes directly connect to spring symbols of new life and rebirth in our culture. In Alsace especially, treats like "Osterlämmele" and decorated cookies have been part of family Easter customs for many generations.
Pro Tips
- Take your butter out of the fridge at least two hours before starting so it's perfectly soft
- Use a piping bag when adding chocolate decoration for better control
- For super clean edges, put the cookie sheet with cut shapes back in the fridge briefly before baking
Frequently Asked Questions
- → What kind of mini eggs can I use for topping?
You can pick from candy-coated chocolate eggs, milk or white chocolate eggs, or even filled ones for extra sweetness.
- → How do I get the perfect cookie texture?
Make sure your butter is softened at room temp before whipping it with sugar. This keeps the dough light and smooth.
- → Can I make the dough in advance?
Absolutely! You can prep the dough up to a day before and store it in the fridge. Just keep it well-covered to prevent drying out.
- → Can I swap the cocoa powder for something else?
Sure! Try hazelnut powder, cinnamon, or citrus zest if you'd like a different flavor twist.
- → How can I decorate them in unique ways?
Use colored icings, edible pearls, sprinkles, or even melted chocolate to make fun patterns and designs.